
QR Code Campaigner is accessible by everybody no matter where or when they work so you can be confident that even your hardest to reach contacts will receive the information they need and want.
Creating a QR Code is easy and there's many reasons that they can be a benefit to your Communications. QR Codes have made it easier than ever to reach those colleagues who are not stationed at a desk or don't have the ability to read through your comms during work time.
You could have your QR Code stationed:
- In Break Rooms
- On Wall Pillars in an open plan office
- In Reception areas
- On posters
Benefits of our QR Code:
- Static QR Code Image - only the Content Assigned changes, making the necessity to continuously print new versions unnecessary. Reducing the need for paper and saving your time.
- Data, data, data - Within the QR Code, you'll see Live data based on your audience in the location it's stationed opening and clicking the content within.
Creating a QR Code
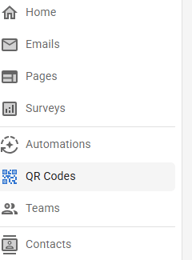
To begin creating a QR Code, click on the QR Codes option in the menu on the left hand side.
You then will have all the QR Codes available to you that have been made in your account previously.
Select 'New QR Code' in the top right hand corner of the QR screen.
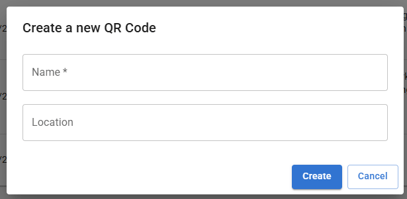
You'll then see a box giving you the opportunity to name what this is for, and then detail the location. So if you have multiple offices, break out rooms, meeting rooms, you may wish to be more detailed on where this will be for on NewZapp's end.
This will then add that QR code to the list of existing codes. From this list you can assign content, however for the sake of this example, we recommend clicking on the name of the new QR code togo into the QR code dashboard.

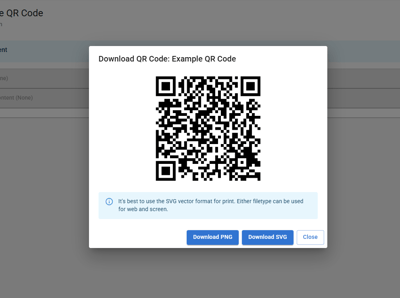
Clicking on the Download QR Code button in the top left will open up a window where you can download that QR code as a PNG or SVG file.
Next step is to Assign Content which you can do by clicking the button on the right hand side that says 'Assign Content'.
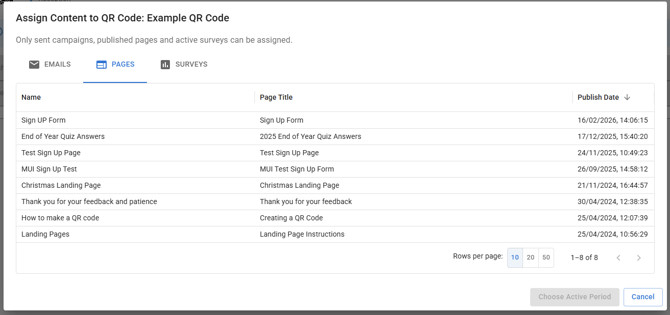
You can then select the Campaign, Landing Page or Survey that you'd like to assign to this QR Code as shown above. For this example I'm going to use Landing Page.
Once you've selected your comms, you can then select 'Choose Active Period'.
This will then take you through to where you can either Assign Immediately or you can schedule so that it starts at a later date and will end at a specific date and time.
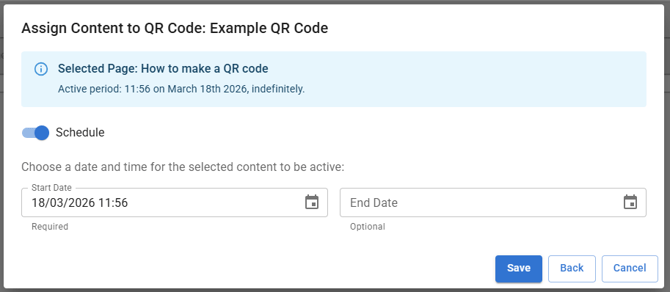
Some of the bonuses of Scheduling your content to the QR Code is that if someone is going on annual leave for example, they could prepare and schedule their comms to assign to this QR Code to relieve the pressure from their colleagues and to ensure everyone has access to the most recent piece of comms.
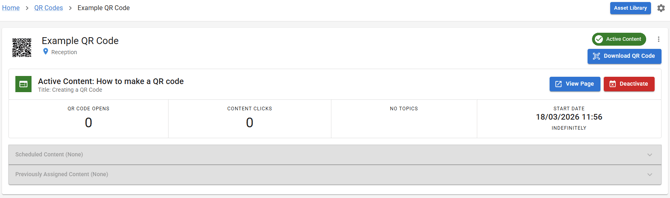
Now that we have allocated content and set for this one to be indefinite we can now see that it's live, both by the Green bordered White envelope on the left and the Green icon advising 'Active Content' on the top right. We can see where what content we've allocated and that it's indefinite as stated on the right in the block columns.
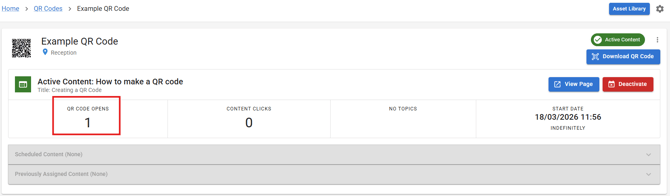
If someone was to open the QR Code where I've put up the QR Code it would look like the screenshot below. We can see the number of times our content has been opened and the number of times links within it have been clicked, unlike within email campains, we can't see who specifically has done that.
So not only will you have the Campaign Data under Reports, but you'll now be able to factor in the reach that you have via the QR Code too so that you can do everything to ensure that your newsletters are accessible for all colleagues.
Reassigning a QR Code to different content
The good thing about QR codes in NewZapp is that you can reassign them to different content. If you had a QR code on a poster in a staffroom, you could always make sure its pointing at your latest newsletter! But how do you do that?
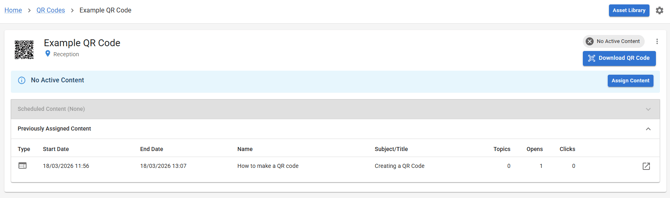
On the dashboard for your QR code simply click the red Deactivate button on the right hand side. This will unassign your QR code from that content so that you can then click the Assign Content button again to select something else.
Crucially, you don't lose the data from the content that you just deactivated. You will see this under the, now activated, Previously Assigned Content drop down box.
See our YouTube training video on QR Codes here